Sunday, September 9, 2012

Perfect Hard Cooked Egg Quest


Since the beginning of the year I have been on a slow carb diet. This past month I have been transitioning to the Paleo diet. On both diets I consume a lot of eggs. While I love my scrambled eggs with salsa in the morning for breakfast, sometimes I need grab and go protein for lunches or snacks. Hard cooked eggs are perfect IF you can get perfect hard cooked eggs. 

I have been on a quest for some time now to get the perfect hard cooked egg. I've tried the boiling water method where you put the eggs in a pan, add water 1 inch above the eggs, and then the instructions go various paths from there. My biggest problem with these methods have been what is boiling? I am an engineer and boiling to me means I get out thermometer and measure the water to 212 degrees Fahrenheit, then start the timer one that point has been reached. I got green rimmed eggs every time. The other method I have experimented with have had better success with, but still inconsistent, is baking the eggs in the oven. I've had eggs crack and brown spots left on the whites with this method. Sometimes the eggs wouldn't be completely cooked and others I would get the dreaded green ring, although not nearly as bad as the boiling methods.
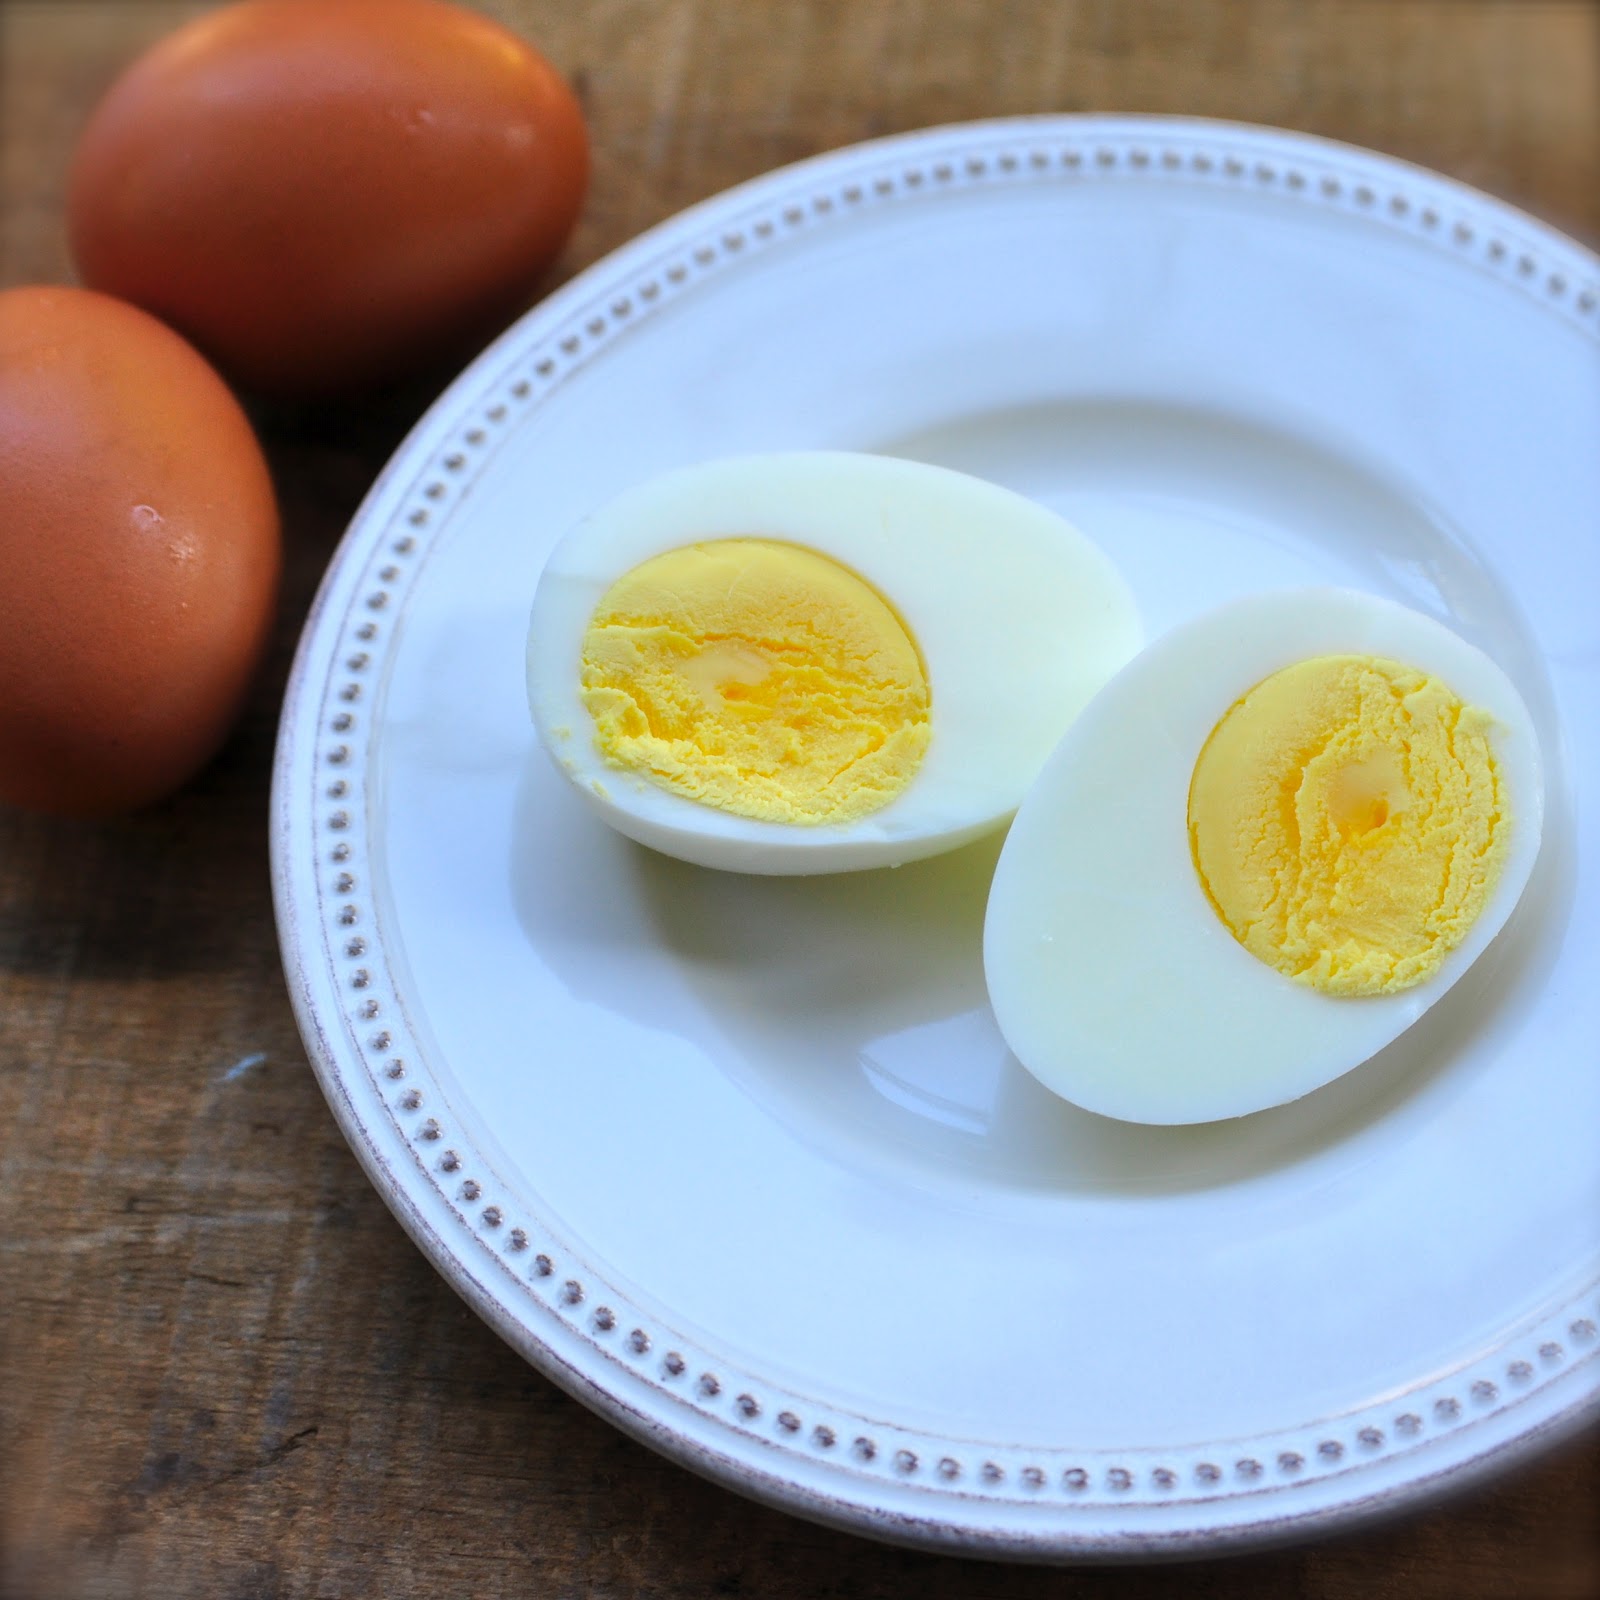
I eventually came upon the method of steaming your eggs. What I like about this method is that you boil the water first with your steamer basket in pot. In this method, I didn't feel like I needed to get out a thermometer. I put enough water in the pan to almost touch the bottom of the steamer, put the lid on, and put the pot on the stove. I turn the stove on to medium high heat and let the water come to a boil or when I hear the bubbles and the lid rattling (very scientific I know). Then I place my eggs in the steamer basket, return the lid to the pan,  and let them cook for 13 min. After they are cooked, I place the eggs in a bowl of cold water for 15 minutes. I then drain and dry them off. They are now ready to eat or store in the fridge for later and beautiful.

For the steaming method I am typically making 4 eggs at a time. In my steamer basket, this method will still work for up to 6 eggs. I haven't experimented with more eggs, but I will update the post with findings when I do. I also did the steaming method several times starting with 18 min. and decreasing the time with each iteration until I got the eggs to where I think they are perfect. The eggs also peel very nicely with this method as well. Store bought eggs do not have to be aged as they arrive at the shelves already aged. I buy my eggs from the farmer's market and have great results as well without aging them.

Friday, March 9, 2012

Rainbows are tasty

A couple of weeks ago I went on a girls weekend with my BFFs (Kadie and Sandra) to NH. Kadie was celebrating her birthday on the trip and I wanted to make her something special. Since I love making cupcakes I saw this recipe for Rainbow cupcakes on pinterest. I pretty much followed the cake recipe and used dyes from Duff's Ace of Cakes I picked up at Michael's. Here is the final result:
One thing I did to get the nice separation was to use a melon ball sized cookie scoop. I used one scoop of batter for each of the 5 colors (blue, green, yellow, orange, and red). I also divided the batter into five clear cups and mixed in the food coloring.
This is what the cupcakes looked like before they were baked.

Here they are fresh out of the oven. Don't they look pretty? I love that you can see the rainbow through the white cupcake paper.
This recipe made 18 cupcakes. I took 4 with me to NH and got them through airport security! Of course I had several people ask me about my cupcakes and ask what bakery I got them from. While I was on the bus to the airport in DC one guy asked me if I got my cupcakes from Georgetown Cupcake. When I told him I made them he said they looked just like Georgetown's. What a compliment. Of course now I'm going to have to visit that cupcakery since I've never been there. As back up cupcakes in case the ones I made got confiscated, I had cupcakes delivered the day after our arrival from Magnolia Bakery in New York. The flavors that I had delivered were Lemon, Caramel, and Red Velvet. We had a taste testing party and think that the Lemon was the clear winner. Sandra's Man preferred the caramel cupcake. So needless to say we had plenty of cupcakes that weekend.
I used a different recipe for the frosting and this one is light, fluffy, and not too sweet.

Fluffy Buttercream Recipe
1/2 cup shortening
1/2 cup butter
4 cups confectioners sugar-sifted
1/4 tsp salt
1 tsp clear vanilla extract
3 oz heavy cream

Cream shortening and butter until fluffy. Add confectioners sugar on cup at a time and continue creaming until well blended.

Add  salt, vanilla, and whipping cream. Blend on low speed until moistened. Add additional cream if necessary. Beat at high speed at least 3 minutes until frosting is fluffy.

Tuesday, March 6, 2012

All in the Packaging

A few weeks ago, I made some cupcakes for a co-worker to sale at a benefit for her family member. I was trying to find a good way to package them up to keep them looking nice and easy to eat. While surfing around on Pinterest I came across a post by Lisa Storms that had the perfect packaging. I loved everything about it down to the color choices. I made my tags by printing out the words on my computer and then punching them out with a Stampin' Up punch. The cake portion for the cupcakes I made were from a Martha Stewart recipe that I will not make again. While the cupcakes were good...they weren't OMG good if you know what I mean. I found the cupcakes to be too much on the dry side for my liking.The cream cheese frosting is from a Red Velvet cupcake recipe that I modified. It was excellent and will be my staple cream cheese frosting. I read a tip somewhere to use cold cream cheese and I reduced the amount of vanilla because I wanted the cream cheese flavor and not a strong vanilla flavor.

Here is a picture of my cupcake with it's packaging along with the frosting recipe.
Cream Cheese Frosting:
1 stick butter, at room temperature
4 oz or 8 TB spoons of cold cream cheese
2 1/2 cups of powdered sugar, shifted
1 tsp vanilla extract

With a hand mixture, whip the butter and cream cheese together on med-high speed for about 5 min. Scrape the bowl down after about 2.5 min. Reduce the mixer speed to low and slowly incorporate the powdered sugar. Add the vanilla and mix until combined. Increase the speed to medium-high and whip a few more minutes until the frosting is light and fluffy, scraping the bowl as necessary.

This will frost 12 copcakes. The recipe can be doubled.